
Why translate?
WordPress has been translated into over 20 languages by the polyglot team. These translations have made WordPress so widely used that it is now used by more than 40% of the world’s websites.
By translating your plugin or theme, it will be used more widely so you can get a bigger return on your investment. In this tutorial, we’ll translate your plugin or theme, starting from creating a .pot file to a .mo and .po file that will be automatically read by WordPress as a translation reference.
Step 1: Make sure your theme or plugin is configured
1. If you are creating a plugin, make sure your plugin’s main file contains
/**
* Plugin Name: Your Plugin Name
* Text Domain: plugin-name
* Domain Path: /languages
*/
The /languages folder is the folder where you will later put the .po, .mo and .pot files for translation needs.
2. If you create a theme, make sure the style.css file contains
/*
* Theme Name: Your theme name
* Text Domain: theme-name
*/
Then make sure you have created /languages, where later you will put the files needed for translation. Also make sure that the filling in the Text Domain uses the slug format.
Before heading to the next step, make sure the text in the theme/plugin that you create uses the translation format as below:
_e("Text to be translated", "theme-name"); // "theme-name" is replaced according to the Text Domain in style.css

__("Text to be translated", "plugin-name"); // "plugin-name" is replaced with the Text domain in the main file of your plugin.
If you don’t use this function, then when we create the .pot file, the text cannot be read.
Step 2: Download Poedit
Download and install Poedit
Step 3: Create the .pot file
This .pot file will contain text that is read by the system. How to create this .pot file is
Make sure you have installed WP-CLI, if you don’t know how to install WP-CLI, you can follow the tutorial here.
Then open the terminal / CMD, open the plugin / theme folder that you created. Make sure your terminal / cmd location is at the root of the plugin or theme folder that you created.
Give the following command:
wp i18n make-pot . languages/my.potwp i18n make-pot . languages/my.pot
From the command, in the languages folder, you will see a new file called my.pot
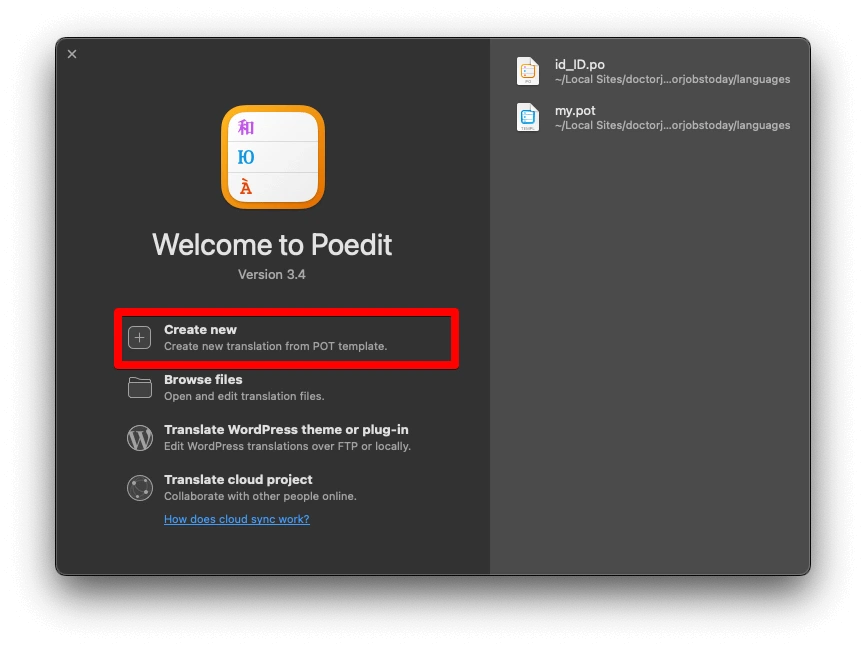
Step 4: Start Translating
After you have the .pot file, now you open the poedit that you have downloaded from step two and select Create new translation from POT template.
Then select the language that will be the destination of the translation, for example here, the theme that I created uses English and I will translate it into Indonesian. So in this section I will choose Indonesian.
![]()
After that, you can start translating the sentences listed in your plugin or theme. You can see what language we are translating to in the file name, for example here the file name is id_ID.po which means we will translate it into Indonesian.
To be able to translate, click one of the words in the Source Text column, then it can be translated in the translation section.
![]()
Don’t forget to save the changes that you have made!